
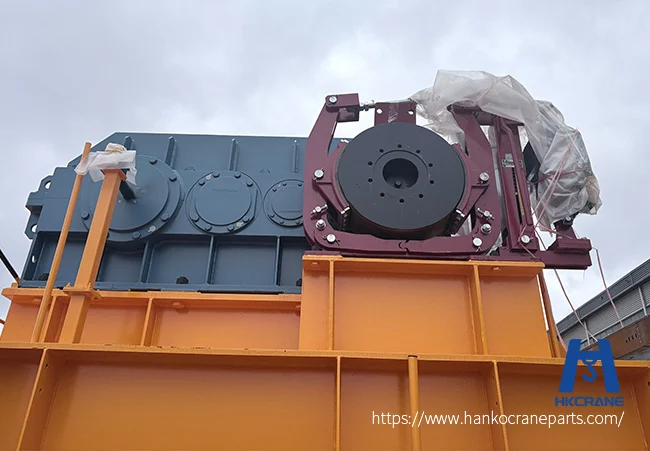
Quick answer: To adjust a crane brake, set the air gap between the lining and brake wheel, verify the spring torque matches the data plate, and test the stopping action under load. Measure — never eyeball — every value.
Need a correct crane brake adjustment procedure? A spring-applied shoe brake has three settings that decide everything: the air gap, the spring force, and the stopping test. This guide walks through each step in order, with the limits you must respect.
Why Brake Adjustment Matters
An out-of-adjustment brake does not fail loudly. It drifts.
- An air gap that is too large slows actuation, so stopping distance grows.
- Spring force that is too low lets the load creep or slide on the rail.
- Unequal shoe clearance tilts the brake arm and wears one lining faster than the other.
Daily operators feel these as “long stops” or “a bit of drift”. Inspectors log them as failing test results. Either way, the fix is the same measured adjustment procedure below.
Before You Start: Safety Setup
Complete these steps before touching the brake:
- Lock out the crane power and tag the disconnect. The brake releases under power — you do not want it energized while your hands are inside.
- Land or secure the load. Never adjust a hoist brake with a suspended load.
- Have the brake data plate ready. It lists the rated air gap and torque values you will set. No plate? Get the maker’s manual before proceeding.
- Gather tools: feeler gauges, a torque wrench, a wrench set for the locknuts, and a marker.
Step-by-Step Crane Brake Adjustment Procedure
Step 1: Measure the Current Air Gap
Insert a feeler gauge between the friction lining and the brake wheel at both shoes.
- Compare the reading against the rated gap on the data plate.
- Equalize both shoes first. If one side reads high and the other low, the arm is off-center. Center it before touching the gap scale.
- Log both readings. The before-value tells you how far the brake has drifted since the last service.
Step 2: Set the Air Gap
Adjust the gap to the data plate value:
- Loosen the locknut on the adjusting bolt of each shoe.
- Turn the bolt until the feeler gauge slides with light drag at the rated value.
- Re-check the opposite shoe and repeat, alternating until both sides match.
- Tighten both locknuts and re-measure. Locknut torque often shifts the gap slightly.
Step 3: Set the Spring Force (Torque)
The apply spring delivers the braking force. Set it by length, not by feel:
- Measure the compressed spring length against the value on the data plate or manual.
- Turn the spring nut to reach the specified length. Longer = less force; shorter = more.
- Confirm the thrust rod or arm travel stays within its range after the spring is set.
- Do not over-compress. More spring force than rated overheats linings and burns the coil of the release device.
Step 4: Check Limit Switches and Travel
Operate the brake by hand or maintenance power and watch the arm:
- The micro-limit switch must signal when the lining has worn to its limit. Verify it triggers at the wear mark.
- The arm should move through its full travel without binding. Sticking travel points to a seized pin or worn bushing — fix that first, or adjustment will not hold.
Step 5: Test Stopping Action
Restore power and run the standard test:
- Hoist brake: lift a test load, cut the drive, and confirm the load holds without drift.
- Travel brake: run the bridge or trolley at normal speed and measure the stop distance against the allowed slide.
- Repeat the test three times. One good stop proves little; three consistent stops prove the adjustment holds.
Record the test results with the gap readings. Trend data turns the next adjustment into a five-minute job instead of a shutdown.
Adjustment Values You Must Not Guess
| Setting | Where the correct value comes from | What happens if guessed |
|---|---|---|
| Air gap | Brake data plate or manual | Long actuation, uneven wear |
| Spring length / torque | Data plate or manual | Load creep, overheated lining |
| Lining wear limit | Wear groove or mark on lining | Metal-to-metal contact |
| Stop distance limit | Crane duty spec / OEM test standard | Failed safety test |
The table above is why HANKO ships replacement brakes with their data plates intact and supplies adjustment data on request. A brake without known values cannot be adjusted safely — only replaced.
Common Adjustment Mistakes
- Eyeballing the gap instead of gauging it. A gap that “looks right” can be 50% off the rated value.
- Skipping the equalization step. Adjusting one shoe first bends the arm geometry; the setting never holds.
- Over-tightening the spring to “fix” a worn lining. This masks the real problem and cracks the wheel later.
- Testing once and walking away. Brake settings settle after the first cycles. Always run the three-stop test.
For a full wear-and-replacement plan, see how to extend crane brake service life. If your brake keeps drifting out of adjustment, the cause is usually wear, not settings — read crane brake failure analysis and prevention.
FAQ
How do you adjust a crane brake?
What is the correct air gap for a crane brake?
How often should crane brakes be adjusted?
Why does my brake keep going out of adjustment?
Can HANKO supply brakes with adjustment data?
Get the Right Brake or Adjustment Support
A measured adjustment keeps a brake safe for months. A worn brake cannot be adjusted back to life. Crane brakes from HANKO ship with complete data plates and adjustment values, so your maintenance team sets them right the first time. Need OEM braking parts or adjustment data? Contact HANKO engineers for a custom quote.

 English
  Korean
  Russian
  Spanish
  Malay
Malay  Afrikaans
  Bulgarian
  French
  Bengali
  Italian
  Hungarian
  Vietnamese
  Thai
Thai  Indonesian
  German
  Arabic
  Japanese