
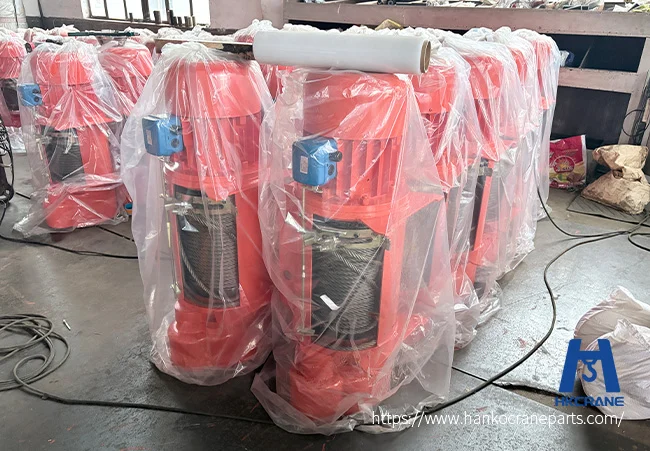
An electric hoist installation guide matters because most early failures trace back to installation, not the hoist itself. This guide walks you through site checks, alignment, brake settings, electrical verification, and load testing before the first production lift.
Quick Answer: Before You Start the Installation
Work through this checklist before power goes on:
- Verify the delivery against the packing list: operation manual, documents, and accessories.
- Confirm the runway beam matches the drawing: support points, splices, and buffers at both ends.
- Check the beam flange: ground smooth, with no protrusion blocking the trolley wheels.
- Match the power supply to the motor voltage and frequency on the nameplate.
- Set the brake gap to the specified range — typically 0.4-0.6 mm on wire rope hoists.
- Set the overload protector at 110% of rated capacity or above.
- Measure insulation resistance above 1 MΩ before energizing.
- Confirm the hook hangs plumb with deviation under 3° after mounting.
Do not power the hoist before installation is complete. The steps below expand each item.
Step 1: Unpack, Inspect, and Verify the Delivery
Open the crate and check the contents against the packing list before you sign the delivery note. You should find the operation manual, the delivery documents, and the accessories listed on the sheet.
Inspect the hoist for transport damage: bent rope, dented surfaces, loose bolts. Photograph anything doubtful and resolve it with the supplier before installation starts.
Finally, read the nameplate. Capacity, lifting height, speed, and reeving must match your order. If the selection logic behind your order is unclear, the rules are covered in electric hoist selection.
Step 2: Check the Runway and Support Structure
The host structure carries every load you will lift, so inspect it before the hoist arrives. Match the beam profile and flange width to the trolley design of your hoisting equipment. Monorail wire rope hoists run on I-beam runways, and the beam must suit the wheel gauge.
At the handover check, confirm three items against the drawing. Support points are built where the drawing requires. Splices follow the specified pattern. Buffer stops sit at both runway ends.
Then check the lower flange. It must be ground smooth — a rough flange or protruding weld blocks the trolley wheels and wears the drive parts prematurely.
Step 3: Position and Align the Hoist
Lift the hoist onto the runway with a reliable crane or lifting device, following the lifting points in the manual. Set the trolley wheels on the beam flange and check the fit on both sides.
Shim or adjust until the wheels seat evenly and the hoist can travel the full runway without rubbing or catching.
After mounting, hang a plumb line from the hook. Deviation should stay under 3°; an off-plumb hook drags the rope against the drum flange and shortens rope life.
Step 4: Set the Brake and Overload Protection
Two settings must be confirmed before the first power-up.
Brake gap: adjust the brake to the specified clearance, typically 0.4-0.6 mm on wire rope hoists. A gap that is too wide lets the load drift; too tight and the brake overheats. Record the setting.
Overload protector: set the action value at 110% of rated capacity or above, per the manual. This device protects the hoist whenever a lift exceeds the rated capacity.
Both values come from the documentation in your delivery — follow those numbers, not habits from previous installations.
Step 5: Complete the Electrical Connections
Connect the hoist to the power supply per the wiring diagram in the manual. Check that the supply voltage and frequency match the motor nameplate before energizing anything.
Measure the insulation resistance of the motor circuit — it should read above 1 MΩ. A lower reading means moisture or damaged insulation, and the fault must be corrected before testing starts.
Before the test runs, place warning signs and barriers around the runway area. Nobody should stand under the hook during commissioning.
Step 6: Run the No-Load Test
Never power the hoist mid-installation. Only after mounting, wiring, and brake settings are complete do you energize the hoist and start the no-load test.
Run the hoist empty several times and check three behaviors. The hook must rise on the up command. The limit switches must cut travel at the right points. The brake must hold instantly on release.
Travel the trolley the full runway length in both directions and watch for rubbing or abnormal noise. Poor limit-switch settings at this stage create the failure patterns covered in common electric hoist failures and fixes.
Step 7: Static and Dynamic Load Testing
Acceptance testing comes after the no-load test passes. The sequence below reflects standard commissioning practice — always confirm the exact percentages against your local lifting standard.
Static test first. Lift a test load of 125% of rated capacity about 100 mm off the ground. Hold it for 10 minutes. Inspect for deformation, brake slippage, or oil leakage while the load hangs.
Then run dynamic tests at rated capacity. Repeat lifting, lowering, and trolley travel cycles until every motion works smoothly under load.
Keep the test records with the delivery documents. If your customer or regulator requires documented material or test certificates, they are available on request. The records also anchor your future maintenance plan, covered in the electric hoist maintenance guide.
자주 묻는 질문
What are the main steps of electric hoist installation?
What brake gap does a wire rope hoist need?
Why can’t you test the hoist before installation is complete?
How is the overload protector set on an electric hoist?
What does static load testing involve?
Get Your Hoist Installed Right the First Time
Installation quality decides how your hoist performs for years — most early failures trace back to shortcuts at this stage. Document every check before the first production lift. When you need steps confirmed for your model, Hanko engineers can check your crane parameters, runway drawings, and duty data.

 English
  Korean
  Russian
  Spanish
  Malay
Malay  Afrikaans
  Bulgarian
  French
  Bengali
  Italian
  Hungarian
  Vietnamese
  Thai
Thai  Indonesian
  German
  Arabic
  Japanese