
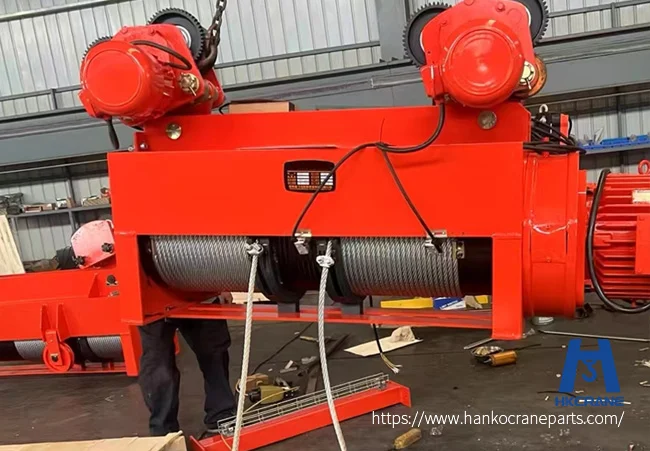
Replacing the wire rope on an electric hoist is a safety-critical task. This guide covers the ISO 4309 discard criteria, rope selection for a wire rope hoist, and a four-step replacement procedure you can follow.
Quick Answer: When to Replace the Rope
Replace the wire rope when inspection reveals any of these conditions:
- Visible broken wires in one lay length exceed the ISO 4309 discard limit.
- The rope diameter has dropped below 90% of the nominal value.
- Broken wires cluster locally, even if the total count is below the limit.
- The rope shows severe corrosion, kinks, or visible deformation.
Never wait for a rope to break before replacing it. The discard criteria exist to remove the rope while it still has margin. On any electric hoist, the rope is the single most wear-prone component.
Wire Rope Discard Criteria (ISO 4309)
ISO 4309 is the international standard for crane wire rope care, inspection, and discard. The criteria below are the key thresholds; confirm the exact values for your rope construction against the standard.
Broken wires. In one lay length, discard regular-lay ropes when visible broken wires reach 10% of the total wires. For lang-lay ropes, the limit is 5%. The difference exists because broken wires in regular-lay ropes are easier to see and tend to distribute more evenly.
Local clustering. If broken wires cluster in a short section — even below the percentage threshold — the rope must be discarded. Localized damage means the rope structure is failing at that point.
Diameter reduction. Discard when the actual diameter falls below 90% of the nominal diameter. Measure at several points along the rope, not just one. Diameter loss points to core degradation, internal wire breaks, or wear from pulley contact.
Corrosion and deformation. Severe external corrosion, pitting, kinks, or visible distortion of the rope structure are immediate discard conditions. A kinked rope cannot be straightened — it has lost its load-bearing integrity.
The wire rope inspection routine in the maintenance plan covers how often to check these criteria and what to record.
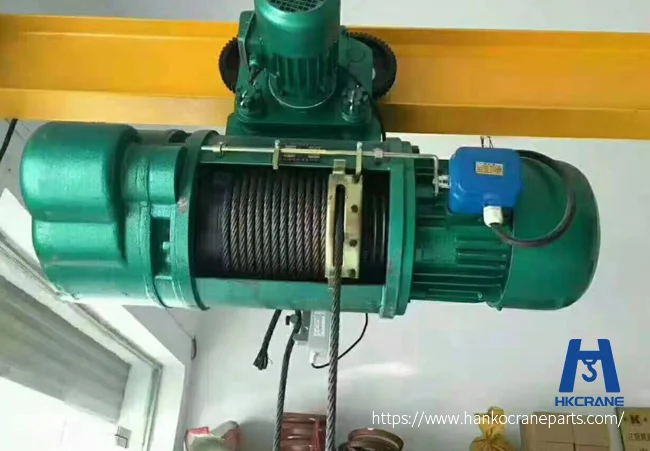
Choosing the Right Replacement Rope
Match the new rope to the hoist nameplate. Three parameters matter most:
Rope construction. Common hoist ropes use 6×19 or 6×37 classifications. The first number is the strands, the second is the wires per strand. More wires per strand mean better flexibility but less abrasion resistance. Use the same construction the manufacturer specified unless an engineer approves a change.
Lay direction. Regular lay (cross-lay) and lang lay behave differently on the drum. Installing the wrong lay direction causes spooling problems and accelerated wear. Check the old rope or the nameplate before ordering.
Diameter. The replacement rope must match the nominal diameter on the hoist nameplate. A smaller rope reduces breaking strength and may not spool correctly; a larger rope will not fit the drum grooves or sheaves.
When you order, confirm the rope’s minimum breaking force meets or exceeds the hoist’s design safety factor. If you need help matching rope specs to your hoist model, Hanko engineers can verify the parameters for you.
Step 1: Remove the Old Rope
Release all tension from the rope before you start. Lower the hook block to the lowest position and disconnect the power supply.
Unwind the old rope from the drum. Keep the rope under control as it pays out — a released rope can backlash and cause injury. Tag the rope with the date and reason for removal, then set it aside for scrap. Never reuse a discarded hoist rope.
Inspect the drum grooves, sheaves, and rope guides while the rope is off. Worn grooves or damaged sheaves will damage the new rope just as they damaged the old one. Replace any worn parts before installing the new rope.
Step 2: Prepare the New Rope
Unreel the new rope correctly. Never pull it off the reel by lifting from the side — this introduces twists that cause kinks. Roll the reel along the ground or mount it on a spindle so the rope pays off straight.
Measure the length you need and add extra for the dead-end termination. Cut the rope with a clean, controlled method — abrasive cutting with the ends pre-seized prevents wire scatter. Seize the rope with wire ties or welding at the cut point before cutting.
Let the rope relax and straighten before installation. A rope installed with built-in twists will spool badly and wear out fast. The hoist installation steps detail the initial setup procedure for new hoist components.
Step 3: Install and Terminate
Attach the rope dead end to the drum using the method the hoist manufacturer specified. Common termination types include wedge sockets, U-bolt clips, and swaged fittings. Each type has specific torque values and clip counts — follow the manufacturer’s instructions for your rope diameter.
Thread the rope through the rope guide, over the sheaves, and down to the hook block. Keep the rope under light tension as it goes on the drum. Spool the first layer evenly, with each wrap touching the next — gaps in the first layer cause problems in the upper layers.
Secure the dead-end termination and verify the rope is seated correctly in all sheaves. Check that the rope guide moves freely and the rope enters and exits the drum grooves without crossing.
Step 4: Test and Bed In
Power the hoist and run it through the full travel range with no load. Watch the spooling on the drum — the rope should lay flat and even. Listen for clicking or popping sounds that indicate a twist or crossing problem.
After the no-load run, perform a load test to confirm the rope and terminations hold under working load. The procedure to load test the new rope walks through the static, dynamic, and brake test stages in order. Do not skip the load test — it is the only way to confirm the termination and spooling are correct.
Records and Replacement Intervals
Keep a rope log for every hoist. Record the installation date, rope construction, diameter, manufacturer, and the name of the person who installed it. Each inspection entry should note the broken wire count, diameter measurement, and any observations.
There is no fixed replacement interval for hoist wire rope. The rope on an electric hoist is replaced based on condition, not age. A rope in daily heavy service may need replacement in months; a lightly used rope may last years. The discard criteria in ISO 4309 — not a calendar — determine the replacement point.
If your project requires documented rope test certificates, they are available on request. Confirm the format you need before ordering.
When should you replace a wire rope on an electric hoist?
What is the ISO 4309 discard standard for broken wires?
How do you choose a replacement wire rope for a hoist?
Do you need to load test a wire rope after replacement?
How long does a hoist wire rope last?
Replace the Rope Before It Fails
Wire rope replacement is a routine but critical maintenance task for any electric hoist. Follow the ISO 4309 discard criteria, match the new rope to the nameplate, and test the installation before returning the hoist to service. When you need help verifying rope specs for your hoisting equipment, Hanko engineers can check the parameters and duty data.

 English
  Korean
  Russian
  Spanish
  Malay
Malay  Afrikaans
  Bulgarian
  French
  Bengali
  Italian
  Hungarian
  Vietnamese
  Thai
Thai  Indonesian
  German
  Arabic
  Japanese